Achieving a professional, crisp finish on sewing projects relies on proper interfacing application. A steam ironing press transforms the fusing process by offering superior results with remarkable efficiency, providing consistent heat and significant pressure over a large surface area. This guide details how to perfectly fuse interfacing using a steam ironing press, ensuring garments and crafts have the structure and polish they deserve.
Understanding Your Ironing Press: The Key to Perfect Fusing
An ironing press is a powerful appliance designed to provide consistent heat and significant pressure over a large surface area, streamlining the ironing process. When fusing interfacing, a steam ironing press offers distinct advantages over a standard iron. Its larger pressing plate covers more ground, reducing the number of presses needed, while its powerful steam output and consistent, even pressure ensure a uniform and secure bond. This means fewer wrinkles, no shifting, and a faster, more reliable fusing experience. Key components like precise temperature control, robust steam generation, and a padded base are crucial for achieving optimal results when fusing delicate interfacing to fabric.
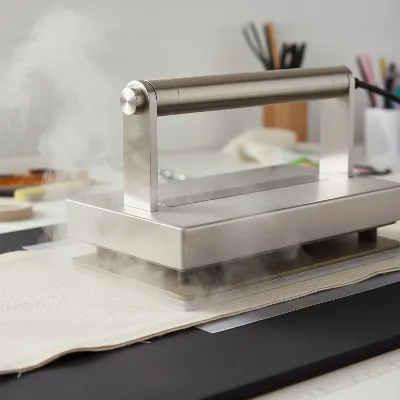 Steam ironing press with fabric and interfacing being fused for a professional sewing project. For expert home reviews on this site.
Preparing for Fusing: Essential Steps Before You Press
Successful fusing begins long before the press even heats up. Careful preparation ensures a strong, lasting bond and prevents common issues like bubbling or peeling. The right interfacing choice, proper fabric treatment, and accurate cutting are fundamental to achieving impeccable results.
Choosing the appropriate fusible interfacing is the first critical step. Interfacings come in various weights (lightweight, medium, heavy) and types (woven, non-woven, knit), each designed for different fabric weights and desired structures. Always select an interfacing that matches or is slightly lighter than your main fabric, and choose a color (white, black, or grey) that won’t show through.
Pre-washing your fabric is highly recommended, especially if it’s prone to shrinking. While most interfacings are pre-shrunk, some fabrics can shrink when exposed to heat and steam, leading to undesirable bubbling or distortion of the fused piece. If your fabric is known to shrink, pre-wash and dry it according to its care instructions before fusing.
Next, accurately cut your interfacing pieces. It’s often advisable to trim the interfacing slightly smaller than your fabric pattern piece, particularly around seam allowances (e.g., 1/8 to 1/4 inch shorter on all edges). This prevents bulk in seams and ensures a smooth finish. Alternatively, you can fuse a larger piece of interfacing to a fabric scrap and then cut out your pattern pieces, which can be useful for smaller, fiddly shapes. Identifying the fusible side of the interfacing is crucial; it’s typically the side with small, visible glue dots or a slight sheen/roughness. This is the side that will make contact with the wrong side of your fabric.
Step-by-Step Guide: Fusing Interfacing with Your Steam Ironing Press
Mastering the use of a steam ironing press for fusing interfacing involves a precise sequence of actions, ensuring maximum adhesion and a smooth finish. By following these steps, you can confidently achieve professional-grade results every time.
Step 1: Preheat and Prepare Your Press
|
Our Picks for the Best Ironing Press in 2026
As an Amazon Associate I earn from qualifying purchases.
|
||
| Num | Product | Action |
|---|---|---|
| 1 | Calogy Mini Heat Press, Heat Transfer Machine, Constant Temp Control, Insulated Safety Base, Fits for Crafts, T-Shirt, Hat, Cap, Pillows(White Pink) |

|
| 2 | Cricut EasyPress Mini Heat Press - for Pressing Small Objects Like Shoes, Stuffed Animals, Hats & More - 3 Heat Settings & Precision Tip - Ceramic-Coated Heat Plate - Compact & Lightweight - Zen Blue |
|
| 3 | Cricut EasyPress Mini™ LT - Mint Green - Mini Heat Press for Pressing Shoes, Baby Clothes, T-Shirts, & More - Easy to Use with a Single Setting - Precision Tip - Compact & Portable Mini Iron |
|
| 4 | BLACK+DECKER Easy Steam Compact Iron for Clothes, Automatic Shutoff, Nonstick Plate, Light Weight, 1200 Watts |
|
| 5 | Steamfast SF-680 Digital Steam Press with Multiple Fabric Settings and Steam Burst Function,Stainless/Black |
|
| 6 | The Quilted Bear Mini Steam Iron - Lightweight Mini Travel Iron for Effortless Quilting & Wrinkle-Free Clothes with Hard Shell Case - Travel Steamer Craft Press for Clothes & Crafts (Black) |
|
| 7 | Steamfast SF-623 Mid-Size Steam Press with Multiple Fabric Settings and Steam Burst Function, Black, 20.47" L x 17.16" W x 6.73" H |
|
| 8 | HTVRONT Heat Press Mini Heat Press Machine, Small Heat Press Portable Iron Press Machine for T Shirts, Hats, Heating Transfer Projects (Mint) |
|
| 9 | BLACK+DECKER Press & Steam 2-in-1 Iron and Steamer, 180% More Steam & One Temperature Technology, Ceramic Soleplate, Safe on All Fabric Types |
|
| 10 | DRFLASH 2-in-1 Steamer & Iron for Clothes,15s Fast Heat-up 1200W Portable Handheld Garment Steamer,Travel Size with Large Ceramic Heat Panel,Quick Wrinkle Removal,110V-120V |
|
Begin by setting your steam ironing press to the recommended temperature for your fabric and interfacing combination. Most fusible interfacings require a medium to high heat setting with steam to activate the adhesive effectively. Allow the press ample time to fully preheat, ensuring consistent heat across the entire pressing plate. Ensure the water reservoir is filled with distilled water to prevent mineral buildup and ensure optimal steam performance.
Step 2: Position Fabric and Interfacing
Lay your main fabric wrong side up on the padded base of your ironing press. Smooth out any wrinkles or creases. Carefully place the fusible interfacing on top of the fabric, with the glue-dot side facing down (towards the wrong side of your fabric). Align the edges precisely according to your pattern instructions. Double-check that no interfacing extends beyond the fabric edges, which could lead to glue residue on your press.
Step 3: Utilize a Pressing Cloth
To safeguard both your delicate fabric and the non-stick surface of your ironing press, always place a lightweight pressing cloth (such as a piece of plain cotton, an old tea towel, or a specialized pressing sheet) over the interfacing. This acts as a protective barrier, preventing the interfacing adhesive from potentially sticking to the press plate and protecting your fabric from direct, intense heat. This step is non-negotiable for clean operation.
Step 4: The Pressing Technique
Gently lower the upper plate of your ironing press onto the pressing cloth, applying firm, even pressure. Unlike traditional ironing, avoid any sliding or sweeping motion. Hold the press down for the recommended fusing time, typically 5-10 seconds per section, or as specified by the interfacing manufacturer. Lift the upper plate completely, reposition the fabric and interfacing to the next section, and repeat the pressing process until the entire piece is fused. Consistent, static pressure allows the adhesive to properly melt and bond.
Step 5: Verify Fusion
After pressing a section, lift the pressing cloth and carefully check the bond between the fabric and interfacing. The glue dots should appear to have melted and blended into the fabric, indicating a secure fusion. Gently try to lift an edge of the interfacing; it should be firmly attached without bubbling or peeling. If areas feel loose, return the pressing cloth and apply another short press to that specific spot.
Step 6: Cool Down Period
Once the entire piece is fused, carefully remove it from the press and lay it flat on a cool, stable surface (like an ironing board or table). Allow the fabric and interfacing to cool completely before handling or moving it. This cooling period is crucial, as the adhesive needs time to solidify and create a permanent, strong bond. Rushing this step can result in a weak bond, leading to bubbling or separation later.
Optimizing Your Fusing Results: Advanced Tips and Troubleshooting
Even with the best preparation, fusing interfacing can sometimes present challenges. Understanding common issues and advanced techniques can help you achieve consistently flawless results and extend the life of your projects.
When working with delicate fabrics like silk or sheer synthetics, exercise extra caution. Always perform a test fuse on a scrap piece first to determine the optimal temperature and time. Use a very fine pressing cloth, and consider reducing the pressure slightly if your press allows, or shortening the pressing time. Some delicate fabrics may also benefit from a “dry” fusing method (no steam) if the interfacing manufacturer specifies it.
Bubbling or peeling interfacing is a common frustration, often caused by insufficient heat, inadequate pressure, or improper cooling. Ensure your press is fully preheated and that you’re applying consistent, firm pressure for the recommended duration. Crucially, allow the fused piece to cool completely flat without disturbance. If bubbles appear, you can often re-fuse them by applying heat and pressure again to the affected area.
Occasionally, despite using a pressing cloth, some interfacing adhesive might transfer to your ironing press plate. If this happens, wait for the press to cool completely. Use a soft, damp cloth or a specialized iron cleaner (designed for non-stick surfaces) to gently wipe away the residue. Avoid abrasive cleaners or harsh scrubbing, which can damage the plate. To prevent future incidents, always use a pressing cloth and ensure interfacing is cut precisely and aligned correctly. not all fabrics are suitable for fusible interfacing; materials with heavy textures, deep pile (like velvet), sequins, or open weaves may not bond well and are better suited for sew-in interfacing.
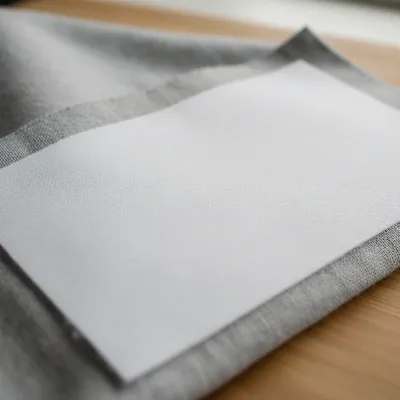 Close-up view of perfectly fused interfacing on fabric, highlighting a smooth and bubble-free bond.
Choosing the Right Ironing Press for Your Fusing Needs
Selecting an ironing press that aligns with your fusing requirements can significantly enhance your garment construction process. While all ironing presses offer benefits, certain features are particularly advantageous for fusing interfacing.
The pressing area size is a primary consideration. Larger pressing plates (e.g., 25″ x 10″ or more) are ideal for fusing larger garment components like jacket fronts or long facings, drastically reducing the number of presses and potential for misalignments. For smaller craft projects or very specific garment sections, a compact press might suffice.
Steam output and control are paramount for fusing. Look for a press with a robust steam generator and adjustable steam settings. Consistent, powerful steam is essential for melting the adhesive evenly across the entire interfacing. Some presses offer continuous steam functions, while others have burst options, both beneficial.
Temperature settings should be precise and easily adjustable to accommodate a wide range of fabrics and interfacing types. Digital displays offer greater accuracy. Pressure capabilities are also vital; a press that applies even, firm pressure across its entire surface ensures a reliable bond. While most presses provide strong pressure, those with mechanisms for adjusting pressure can be advantageous for extremely delicate fabrics. Finally, safety features like automatic shut-off are crucial for peace of mind, especially during longer crafting sessions.
Maintaining Your Ironing Press for Longevity and Performance
Proper care and maintenance are essential for extending the lifespan of your steam ironing press and ensuring it continues to deliver optimal performance for all your fusing tasks. A well-maintained press will provide consistent heat and steam, which is critical for achieving perfect interfacing bonds.
Regular cleaning of your press plate is fundamental. After each use, especially if any adhesive residue is present, allow the press to cool completely. Then, wipe the plate with a soft, damp cloth. For stubborn spots, use a specialized iron cleaner or a mixture of baking soda and water, applied with a soft sponge, ensuring to wipe all residue clean. Never use abrasive scrubbers or sharp objects, as these can damage the non-stick coating. Regularly check and clean the padding on the lower pressing board, replacing it if it becomes worn or stained.
The quality of water used for steam directly impacts your press’s performance. Always use distilled water to prevent mineral buildup (limescale) in the steam vents and internal components. Hard water deposits can clog steam holes, reduce steam output, and potentially stain fabrics. If your press has a descaling function, follow the manufacturer’s instructions for periodic descaling.
Proper storage protects your investment. When not in use, ensure the press is completely cool and dry before closing and storing it in a clean, dust-free environment. Many presses come with a locking mechanism to keep the plates closed, which helps protect the heating element and pressing surface from accidental damage. Adhering to these simple maintenance tips will ensure your steam ironing press remains a reliable tool for years to come.
“A well-prepped fabric and the right temperature on your ironing press are half the battle won when fusing interfacing. Patience during the cooling phase is the other half.” – Sarah Miller, Textile Arts Instructor
Conclusion
use the power of a steam ironing press for fusing interfacing is a major upgrade for anyone serious about sewing and crafting. It simplifies a once-fiddly process, guaranteeing precise, consistent, and durable results that elevate the quality of your finished projects. By understanding the principles, meticulously preparing your materials, and executing the fusing steps with care, you unlock a new level of professional finish. that the right heat, sufficient steam, even pressure, and a crucial cool-down period are your allies in achieving that impeccable bond.
Why not improve your sewing workflow and experience the unparalleled efficiency and superior results an ironing press brings to fusing?

I tried using my steam ironing press for fusing after reading this, and while it definitely covers more ground than my old iron, I found the initial setup a bit cumbersome. It’s great for big pieces, but for smaller, intricate interfacing sections, I still prefer my handheld iron. The consistent heat is good though, no complaints there.
This was so helpful! I always struggled to get a smooth, bubble-free finish when fusing interfacing, especially on collars and cuffs. The detailed steps on how to perfectly fuse interfacing using a steam ironing press made it incredibly easy. My crafts finally have the structure and polish I’ve been aiming for.
I’ve been using a steam ironing press for general ironing for a while, but never really thought about its potential for fusing interfacing until reading this. The tip about the powerful steam output really helped me get a better bond on some tricky woven interfacing. My only minor complaint is that it took a bit of practice to get the placement just right without shifting the fabric.
I used to dread fusing interfacing on larger projects, it was such a pain with my regular iron. This guide on using a steam ironing press for fusing was a game-changer. The consistent heat and pressure over a large surface area really makes a difference, and my garment projects look so much more professional now. Highly recommend for anyone serious about their sewing.